Creating a small Stimulus.js app to handle Markdown Images
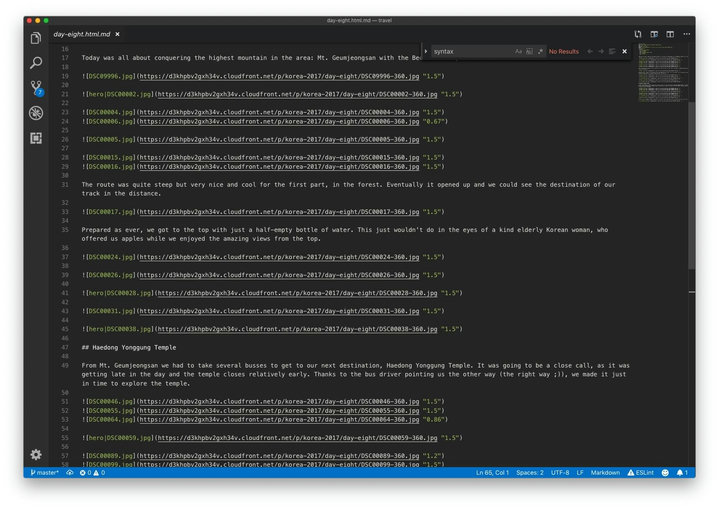
I take a lot of photo’s on each trip I take and collect them on my blog. Each of these photo’s is inserted into a markdown file and after a dozen or more images the markdown becomes unreadable.

I upload the images to S3 with CyberDuck and from there AWS Lambda takes care of image resizing. This way I can drop an entire folder of images onto CyberDuck and everything is taken care of.
Well.. everything but inserting the images into the markdown file. I did have a script for that, but usually I like to arrange images in a different order, or group them together. This is really tedious with 50 images, as I have to refresh the page each time I move an image.
What I want is a place where I can see all the images I can use and get the correct markdown tag to insert into my post.
I can build a 200MB Electron App with React, but we can do the job a lot easier with plain HTML and Stimulus.js. Their handbook already describes a good part of what I want, something that can set my clipboard to a markdown tag.
The “app” will consist of a “drop zone” where I can drop images and an input where I can set the base url for the markdown tag.
The HTMl looks something like this:
<div
  data-controller="dropzone"
  class="dropzone"
  data-action="dragover->dropzone#acceptDrop drop->dropzone#handleDrop dragleave->dropzone#leaveDrop"
>
  <header>
    Base url: <input data-target="dropzone.baseUrl" type="text">
  </header>

  <ul data-target="dropzone.polaroidList" class="polaroid-list"></ul>
</div>
We have a Stimulus controller called “dropzone” that listens to three DOM events, dragOver, drop and dragLeave. It maps these to three Javascript functions in the Stimulus controller.
For example dragover->dropzone#acceptDrop means that Stimulus will call acceptDrop on the dropzone controller when dragOver is triggered.
To get a working URL to the image we need a base url that will prepend the image name, for this we use an input. To be able to read the input from Stimulus, we have to make it available. We do this by setting it as a target with data-target="dropzone.baseUrl".
We also need a place to render the dropped image, for this we also need a target, in this case it’s the UL with data-target="dropzone.polaroidList".
The Stimulus controller looks like this:
application.register("dropzone", class extends Stimulus.Controller {
  static get targets() {
    return ["polaroidList", "baseUrl"]
  }
  acceptDrop(ev) {
    ev.preventDefault();
    this.element.classList.add("dropzone--dropping");
  }
  leaveDrop(ev) {
    ev.preventDefault();
    this.element.classList.remove("dropzone--dropping");
  }

  handleDrop(ev) {
	  ev.preventDefault();
    /* [...] */
  }

  addImage(file) {
    /* [...] */
  }

  renderImage(file, event) {
    /* [...] */
  }
})
We can see the three bound functions, acceptDrop that adds a class to our element, so we can style it accordingly to let the user know that the files can be dropped. leaveDrop to remove the styling when the user decides to not drop the images. Finally handleDrop that will proces the dropped files to render images.
There are two other functions that we’ll need to render the image.
Let’s start with handling the files that have been dropped, we need to get the data from the file, so we can render an image.
Mozilla’s MDN tells me this is the way to do it, so we’ll use that.
handleDrop(ev) {
  ev.preventDefault()
  this.element.classList.remove("dropzone--dropping");

  if (ev.dataTransfer.items) {
    // Use DataTransferItemList interface to access the file(s)
    for (var i = 0; i < ev.dataTransfer.items.length; i++) {
      // If dropped items aren't files, reject them
      if (ev.dataTransfer.items[i].kind === 'file') {
        var file = ev.dataTransfer.items[i].getAsFile();
        this.addImage(file)
      }
    }
  } else {
    // Use DataTransfer interface to access the file(s)
    for (var i = 0; i < ev.dataTransfer.files.length; i++) {
      this.addImage(ev.dataTransfer.files[i]);
    }
  }
}
We start by removing the dropzone—dropping class from the element, so it no longer tells the user it’s ok to drop files (as that’s already been done).
Then we check what kind of drop event we have, depending on the browser we need to handle the event differently. Both ways result in the addImage method being called with the dropped file, let’s see what it does.
Now that we have the raw data from the dropped file, we need to convert it into an Image, as we can’t display the raw data by itself. This is where FileReader comes in. It’s a way to read raw data and return a data: url that we can use in the image’s src tag. You can read more about it here
The FileReader works with a callback, and our function looks like this:
addImage(file) {
  var reader = new FileReader();
  reader.onload = (event =>  this.renderImage(file, event) );
  reader.readAsDataURL(file);
}
We create a new FileReader and set the onload event to call renderImage in our controller. We then pass in the raw data so it can load the data.
Now that we have a data: url that works with the image’s src attribute, we need some place to render it.
We can use a lot of document.createElement calls to eventually get the structure we need, but modern browsers have a much nicer way to accomplish this called templates.
Ours looks like this:
<template id="polaroid-template">
  <li data-controller="polaroid" class="polaroid">
    <img src="" data-target="polaroid.image" />
    <span class="polaroid-copied" data-target="polaroid.copied">
      Copied!
    </span>

    <div class="copy-elements">
      <input data-target="polaroid.source" type="text" value="" readonly />
      <a href="#" data-action="polaroid#copy" class="polaroid-button">
       Copy
      </a>
    </div>
  </li>
</template>
Because we use the <template> tag, the browser won’t actually render this HTML, but we can still use it to populate it with our image and render it to the DOM.
If you look closely you can see that this template contains another Stimulus controller named polaroid.
This is where renderImage() in our controller comes in.
renderImage(file, event) {
  var template = document.querySelector('#polaroid-template');

  // Clone template and fill the values
  var clone = document.importNode(template.content, true);

  // Set the image source and data attributes from the FileReader
  var img = clone.querySelectorAll("img")[0];
  img.src = event.target.result;
  img.setAttribute("data-filename", file.name);
  img.setAttribute("data-url", this.baseUrlTarget.value + file.name);

  this.polaroidListTarget.appendChild(clone);
}
What we can do with the template is clone it to a new element and then change the attributes of its children to the values we like.
In our case we render the given image to the img tag and we set two data attributes we need along the way.
You can also see that we use the two targets we made in our HTML, baseUrl and polaroidList. We can access these targets in our Stimulus class by appending Target to the names. polaroidList becomes polaroidListTarget which we use to append our cloned template to the DOM.
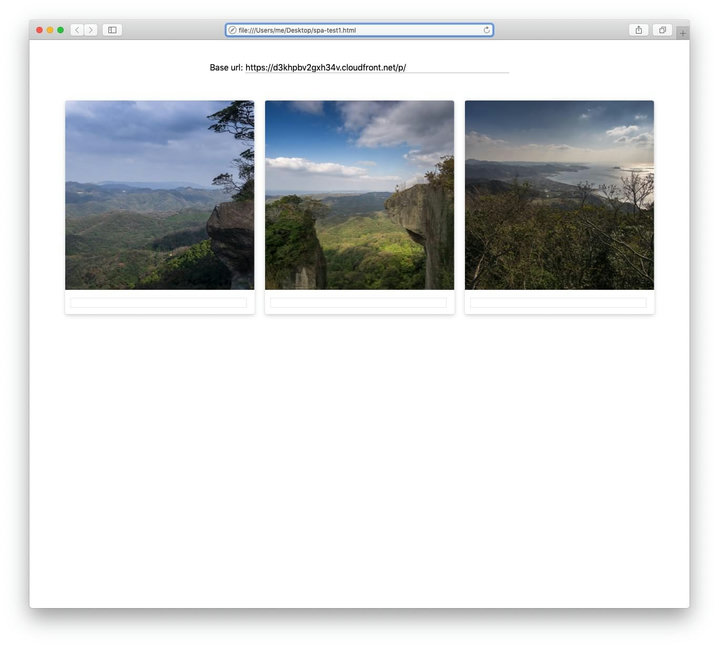
With a few sprinkles of CSS it should look something like this:

As described before, the template tag contained a polaroid controller dataattribute. This is hooked up to a polaroid controller in Stimulus.js that looks like this:
application.register("polaroid", class extends Stimulus.Controller {
static get targets() {
return ["source", "image"]
}
copy(ev) {
ev.preventDefault();
this.sourceTarget.select();
document.execCommand("copy");
this.element.classList.add("polaroid--copied");
}
connect() {
if (document.queryCommandSupported("copy")) {
this.element.classList.add("polaroid--supported");
}
var input = this.sourceTarget;
var img = this.imageTarget;
var ratio = Math.round(img.naturalWidth / img.naturalHeight * 1000) / 1000;
// Sets a markdown image tag: 
input.value = " + " "" + ratio + "")"
}
})The template set two targets:
The image tag (<img data-target="polaroid.image" />) and an input field (<input data-target="polaroid.source" />) where we’ll generate the markdown tag.
We use the connect() function that is called whenever a new controller is detected to check if the browser supports clipboard access and if it does we’ll add a class name to the polaroid element. We can use CSS to render the copy button.
We also calculate the image ratio and fill out the input field, based on the data from the data attributes we passed in the dropzone controller using the targets mentioned above.
The last thing we need to do is to connect the link that says copy with the Stimulus controller:
<a href="#" data-action="polaroid#copy" class="polaroid-button">
  Copy
</a>
This will call the copy function in our controller:
copy(ev) {
  ev.preventDefault();
  this.sourceTarget.select();
  document.execCommand("copy");
  this.element.classList.add("polaroid--copied");
}
The copy function stops the event so we can handle it ourselves. We select the value of the input and issue the copy command to the browser. Finally we add a class to our polaroid element, so we can show that the file has been copied.
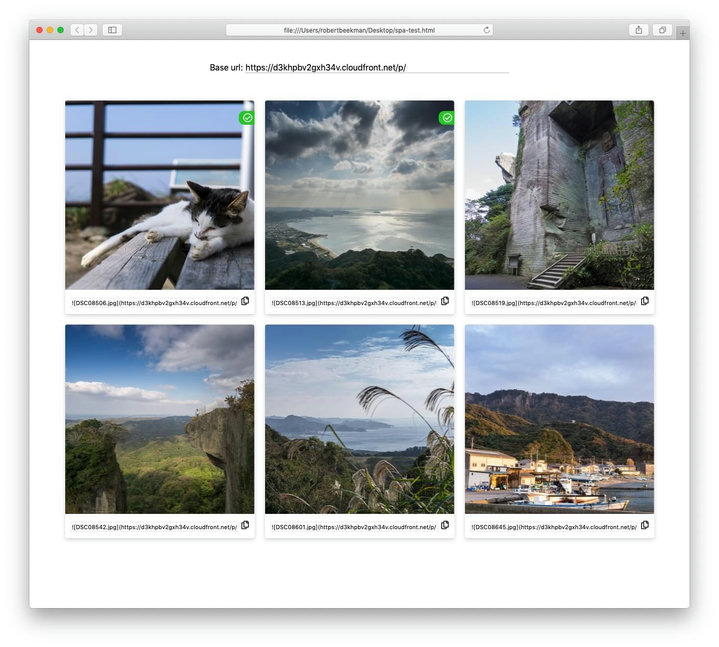
With a few fontawesome icons and a bit of CSS it now looks like this:

You can find the code on GitHub and view a live demo here
With all these amazing frameworks we have available these days it’s very easy to make a small one-page app to scratch an itch and Stimulus.js is a great library to add dynamic items to your page without having to use React or Vue and if you still use jQuery I highly recommend to move to Stimulus.js.